Continued from Part 1
TOOLS AND MATERIALS:
– Translucent Liquid Sculpey
– X-Acto knife
– brass tubing 3/32″ and 1/16″
– Magic smooth epoxy gel
– Angelina Film
– wing wire
– crystal lacquer
– microbeads
Day 14.
The hands are baked.


Well, it can be seen from the photos that the hands are far from perfect – odd bumps and mistakes all over. Well, the good news is I don’t have to live with them. With the help of X-Acto (BRAND NEW blade please), working VERY carefully, one tiny cut at a time, I can carve out and remove everything I don’t find pleasing to the eye. After that, I will ADD tiny bits of clay and coat it all with TLS (Translucent Liquid Sculpey) and REBAKE.
Here is what I have as of now:


*******************************************************************************
Day 15
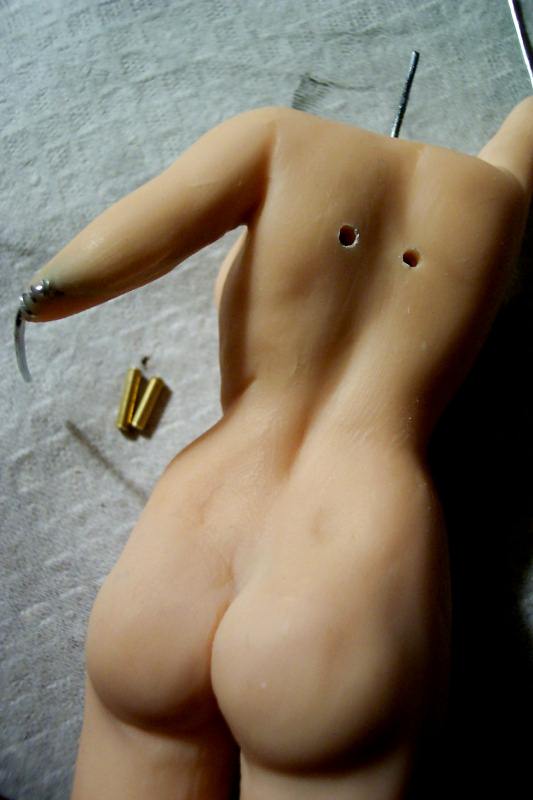
Good morning! First, I did some picking and cutting on the hands, coated with thin layer of TLS (Translucent Liquid Sculpey) and rebaked. While the hand modules were in the oven, I drilled the wings holes (if you are smart, you do the wing holes during the sculpting stage).
Tiny pieces of 3/32 tube go into the holes, secured with a bit of Magic Smooth epoxy. My wings will be built on 1/16 brass tube (upper main vein) which fit into 3/32 tubes inside her back. If this is confusing, here are the pictures to show what I mean:


Meanwhile, the oven ring went off – the hands are ready. Here they are, piping hot:


Fortuna is ready for assembling. Magic Smooth epoxy goo is mixed and all modules slide on their appropriate locations. Making sure that the legs and forearms are the same length, that the neck is long enough, etc. It is fun to play with modules slightly rotating the tubes and slightly bending the wires, trying to find the best angle for the head, hands and feet. This is a good time to be really sure of the pose, because after Magic Smooth sets in, any corrections, although possible, are undesirable. She really needs to be left alone and cure just like that – on the globe and that will take about 12 hours. However, life is brief, I still have about an hour to sculpt, so I am going to expedite the epoxy curing process by putting her in the oven for 10 minutes at 230 degrees.


Day 17
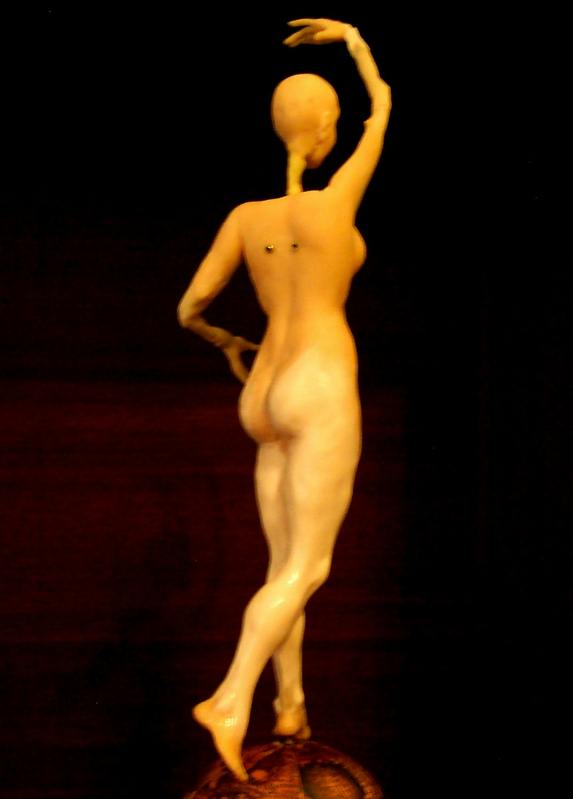
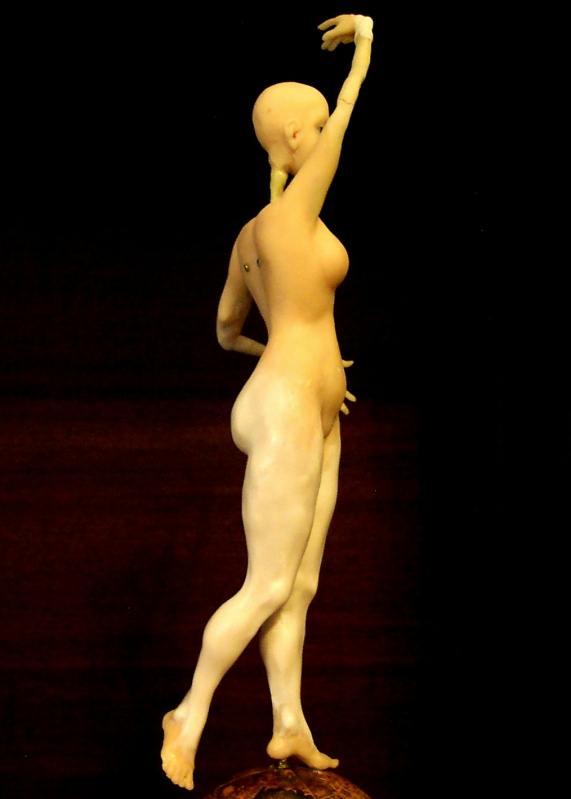
All connections are epoxied together and covered with a thin layer of clay and baked. Once this layer of clay is baked, there is no way to correct the pose without breaking the clay. So before baking, one more final check for the plumb line.
THE PLUMB LINE RULE
When a subject stands with the weight on one foot, the inside of the ankle supporting the weight is in a direct line straight down from the pit of the neck. This holds true whether the body is viewed from the front, back, or side. This very important line is called the PLUMB LINE.


I also made the wings. There are a lot of good tutorials on how to make wings using fusible film, one of my favorites is by wonderful artist Deb Wood. Just search on Google for “wings tutorial Deb Wood”, you will see it.
Fortuna wings were made with Angelina Film in Crystal Mother of Pearl, clear copper craft wire, Fabritac glue (not the best choice for this – too stringy), 3D Crystal Lacquer.


Day 18
Sculpting the legs. First – I made two thick solid columns. Second – with the help of the caliper divided the distance between the pelvis and ground into four equal parts, like shown on the proportion diagram below. Then, with a pristine clean designated X-Acto knife, started carving away little by little from all sides to try to give Fortuna shapely legs. I am still working on it, will be back with more.


I came to the point where I cannot improve without ruining the parts that are good. So I am just going to bake what I have. After it is baked, I will use X-Acto knife to shave off bumps, etc. Then I will add clay where needed and rebake. I took 8 point pictures – these will help to see what is wrong when I return to it tomorrow.


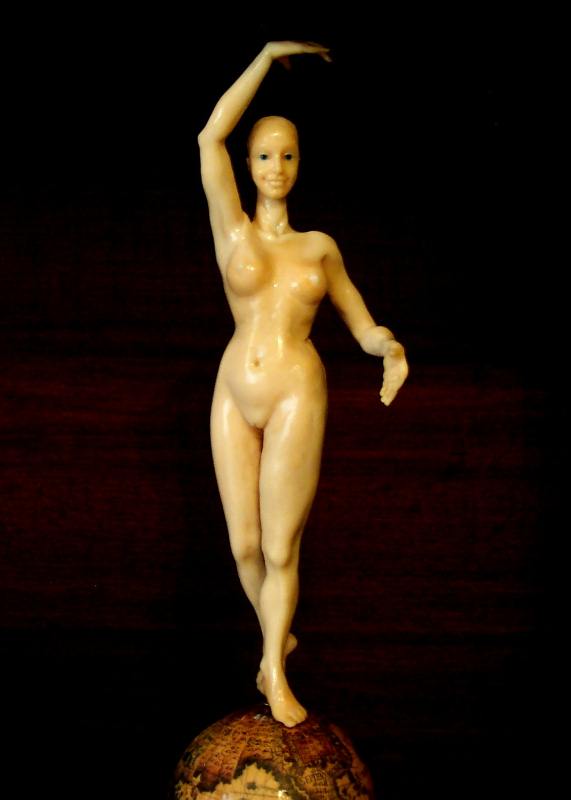
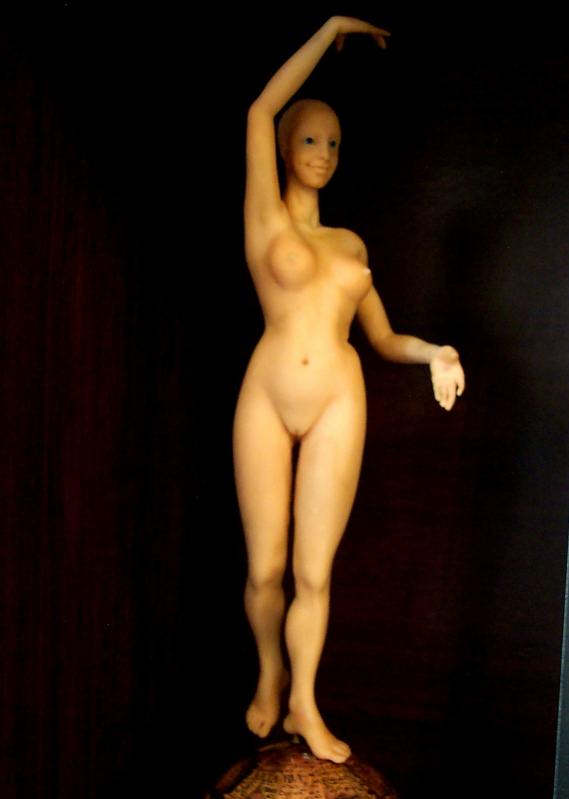
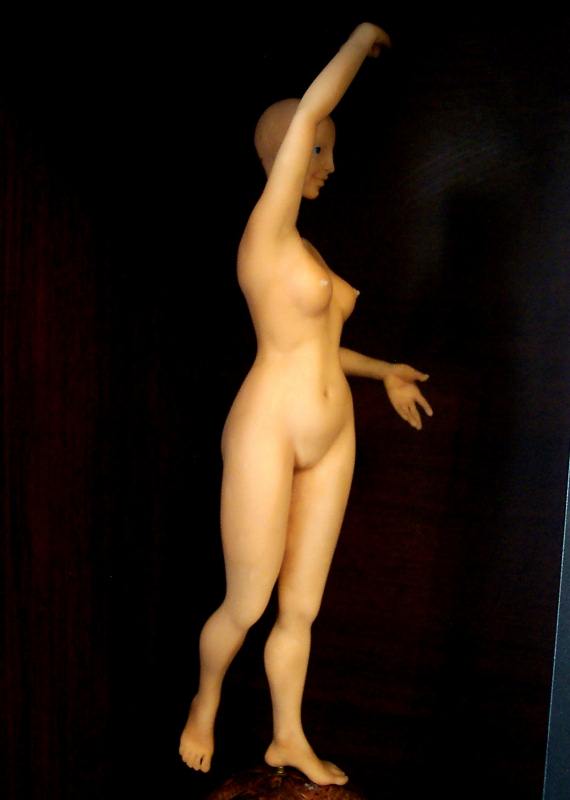
The closer to the completion, the harder it is for me to put Fortuna down. Here it is 12:20 and I am still working on her. Here is what has been done – all the connections are sculpted. Quite unexpectedly, she got more meat on her back – the arms dictated that. She was baked and her right leg and thigh was sanded.
Until now Fortuna was an easy-going happy sculpt. Now I ran into a problem. It is my second time with Puppen Fimo, and the first time I did not sand the sculpt as it was fully clothed. The problem that I am facing is the layer of TLS over the Puppen Fimo – they differ in color, TLS being a bit grayer, Puppen Fimo is more pink. When I started to sand, patches of pink started to appear. The difference is very subtle, but enough to make me want to strip the layer of TLS completely from the entire sculpt. So the conclusion is – use TLS (Translucent Liquid Sculpey) AFTER ALL SANDING IS DONE.
Here she is, covered in polymer oil which highlights all the imperfections and keeps the sanding dust levels down – it is a messy job, though. I will continue to sand tomorrow and will keep you posted. The sanding is done with the roughest sanding paper I have – Emery cloth 80 and steel wool (Coarse).
Day 19


Day 20
All baked, all sanded, coated with TLS (Translucent Liquid Sculpey) and rebaked. Here is comes the part when I start NOT to like my doll. I see my own skill limitations and it frustrates me. But I have to push through the dissatisfaction and keep going. It happens with every doll, but I know I will fall in love with her again once she is done.


Anyway, to cheer both of us up, I took the pictures en plein air. She is a deity after all, so the backdrop of bright spring skies is rather appropriate.


Good morning! I feel better about Fortuna – she is going to be a delightful sculpt after all.
I made eyelashes this morning and took some pictures to show how this can be accomplished the painful way. I don’t know any other way to make eyelashes – realistic enough to even bother about it.
I tried eyelashes a few times on my previous dolls, but that was hardly satisfactory. So I was mulling it over and I think I figured out a workable method. This is my first time to make them this way, so I am sure I will think of improvements later, but for now it is what it is.
This way will work on glass eyes only (I think).
1. Figure out what color Tibetan lamb fur I am going to use for hair. Eyelashes will be made out of the same fur.
2. Search out and lay out fur pelt, Crystal Lacquer, sharp scissors, toothpicks.
3. Cut a small strand of hair and shred into tiny pieces 1/8″ long.


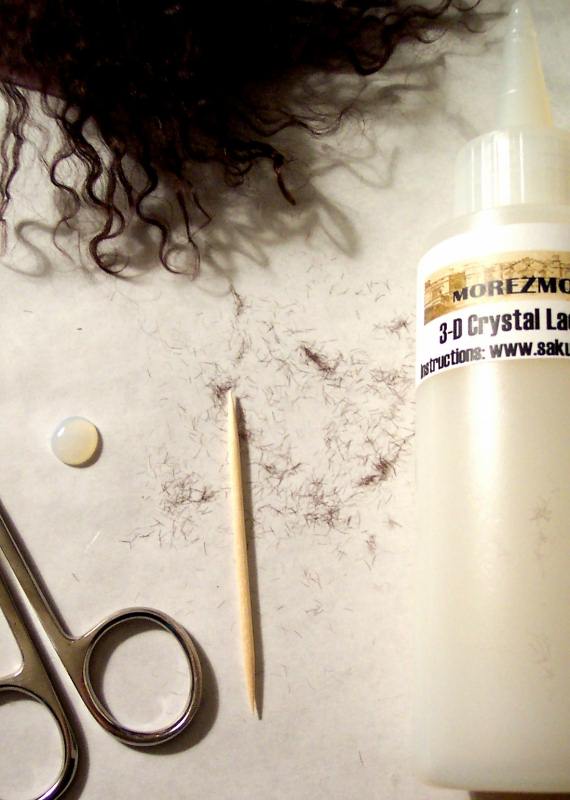
4. Apply very thin line of Crystal Lacquer to the upper eyelid (blue on diagram):

5. Wet a toothpick and holding it UPRIGHT VERTICALLY pick up a few “eyelashes”, making a small “bouquet”. 3-5 eyelashes at a time is good enough.

6. Press the “eyelash bouquet” (red on diagram) into the Crystal Lacquer line (blue on diagram), aligning the bottom of the bouquet with the line where the lid meets the eyeball (green on diagram). Keep going until you have a decent number of eyelashes all around the lid. Don’t sigh in frustration as the eyelashes will fly away, you will have a mess and will have to start all over.

7. Wait a few minutes to allow the Crystal Lacquer to set, but not harden completely. With an X-Acto knife, working on a small area at a time, press in and upward into the line where the lid meets with eyeball (green on diagram). That will tuck the Crystal Lacquer and the roots of the eyelashes under the lid and re-align the eyelashes so that they extend more forward and even a little downwards at the corners.

8. All of this is easier said than done, but it is possible. With a bit more practice, I am sure I can make gorgeous eyelashes in the future.

I said that it will only work on glass eyes because you have to make scraping motion with that X-Acto knife to tuck the Crystal Lacquer in. It works great on glass eyes – Crystal Lacquer line just slides upward and stays there and the eyes get clean at the same time. I am not sure how this will work on painted eyes.
Now, looking at the picture, I think I will add more lashes at the corner, try to trim them and do the lower lid as well. Will be right back.
……
I am back with more eyelashes. I am going to leave the face alone. It is very close to the dreamy-sexy and indulgently-benevolent look I was going after. I hope you think so too. I am off to making hair. Will be right back – I hope today.


Well, BEFORE the hair I need to do one more thing – blushing. If you have any sense in you, you really need do it before hair, makeup or eyelashes. It is not my favorite part – I am not too good at it, but as I committed to show you everything, here it goes.
First mix Genesis Matte Varnish, Genesis red (a bit), Genesis burnt umber (a bit). Genesis Matte Varnish has a thick petrolleum-jelly-like consistency. A drop of polymer oil dilutes it nicely. You can see the mix on the saucer – the part with the paint brush sitting on it.

Now I painted her all over, then deepened pink/brown color in all the appropriate, in my opinion, areas – all folds, armpits, palms of the hands and soles of the feet, behind the knees, neck, forehead, cheeks and chin, breasts and tummy, buttocks, etc.

Put her in the oven, brought the temperature to 265 and turned it off to cool. That sets the genesis paint.

Well, here it is, she will have to consider herself blushed. I can see that I lost the nipples color in the process, that can be touched up with simple water-based paint later.

One more thing – my white silk gauze has arrived, just in time for making her costume. I am looking forward to costuming – white and gold color scheme – what do you think…
If you mess up with blushing (and I did), you can rub the excess of paint and smudges with alcohol and sort of blend it better.
I touched up the eyebrows, the nipples and lips, set the genesis paints in the oven (again) and I am putting her aside until tomorrow. Here is what I have now:


Continues on Part 3

[…] Continues on Part 2 […]
LikeLike
[…] is a detailed description of how to put hair on Fortuna page, the general principle is about the […]
LikeLike
Love, love, love this
LikeLiked by 1 person
More info please
LikeLiked by 1 person
Thank you, Fran. There is a link to Part 3 – look at the bottom of this post
LikeLike
Desejo saber o valor da sereia e se você faz sereia menina aguardo resposta obrigada
LikeLike
Desejo saber o valor da sereia e se você faz sereia menina aguardo resposta obrigada
LikeLiked by 1 person
Hi, Denise, these dolls are already sold. Please subscribe to know about the new dolls. Thank you!
LikeLike
[…] Continued from Part 2 […]
LikeLike
[…] Continued from Part 2 […]
LikeLike
[…] The eyelashes are made out of Tibetan lamb as described on Fortuna Post […]
LikeLike