Day 1.
I found this lovely victorian image of Fortuna by Jean Bernard (“Fortuna”, Bridgeman Art Library, London, England). I also bought on Ebay this small vintage old world globe.


Day 2.
First thing would be to make an armature. Fortuna will have the Morezmore Modular Brickhouse Armature. I will take as many pictures as possible and outline the step by step process to show what it is all about.
TOOLS AND MATERIALS:
– 8″ tall skeleton image. If you don’t have it, you can download it from this link
– steel wire 17 ga
– thin wire steel 24 ga
– long-nose pliers
– wire cutters
– brass tubing 3/32″ and 1/16″
– tubing cutter
– wooden plaque for base
– Magic sculpt epoxy putty
– Magic smooth epoxy gel
– Translucent Liquid Sculpey
All right, first I bend the wire on this handy armature peg board (you can do by hand, following the skeleton bones). The objective is to have something like that:


These are the tools. I am starting to tie the steel wire pieces together, trying to make it tight and secure, so that nothing rotates, rocks, shifts, moves or wiggles in the hip area:


Here it is, tied up together. I like my fantasy women long-legged and long-necked, so my armature does not exactly follow the skeleton proportions. Now bending the spine to give it the curves in the lower back, shoulder and neck area.


Now, with the tube cutter, I am cutting 3/32 tube to make the head, hands and feet modules. Measure tube to the armature, make a little dent on the tube with wire cutters, insert into tube cutter, tighten the knob, rotate a few times, tighten the knob again, rotate again a few times and so on. Gently try to bend the end sticking out of the tube cutter, when the it is ready, it will snap off. The tube opening will come out sort of smaller because the cutter will push the walls of the tube inwards, straighten it out with an awl or icepick (insert icepick into the opening, tap a few times and rotate and work it open).


Here are all the modules and armature. Notice that the leg wires are cut under the knees. Assemble all and pose.


Day 3.
Fortuna is 8″ tall sculpt. The tube combination 3/32 + 1/16 will be too flimsy for her weight-bearing leg. So I am going to step up and go with 1/8 + 3/32. To keep the connection snug and tight, I am going to keep a little piece of 3/32 tube and put 1/8 tube over it. Here is what it looks like. I am using a temporary base – unfinished wooden plaque – while I am waiting for my globe.


Before applying the Magic Sculpt epoxy over the armature, I wrapped the main thick wire with thin wire – the little “teeth” will help Magic Sculpt to adhere better.


Now, removing all module tubes and covering the armature with Magic Sculpt – keeping the areas where tubes slide on clean. Adding bulk to rib cage and hip bones. Pushing Magic Sculpt into the wire so that there are as little air pockets left inside as possible.
Then wrapping a bit of thin wire over the head module tube and making something like a bit of a scull – flat on the face area with a bump on the back of the head.
It will need to be curing for at least 12 hours before I can continue. So this is what I have now – see below.


Day 4.
This morning was spent on trying to insert glass eyes into the sculpted head. Rather frustrating process – I would sculpt a beautiful face, try to insert the eyes and mess it up. Start again, same thing. Another option – sculpt the head around the eyes – did not work either, the eyes move and shift around and the goddess is either cross-eyed or has a lazy eye or something. So finally I came up with this idea. The eyes are set onto the scull and baked. Will try again – at least the eyes are looking straight, aligned and not going anywhere and I can sculpt around the eyes. I will let you know how this goes. Meanwhile, does not look like a classic beauty, does it.

Day 5.
The head is done and baked – my first time with glass eyes, first time with a smiling face, first time with (I guess I felt like I needed an extra challenge) a classical roman profile. Something like that:


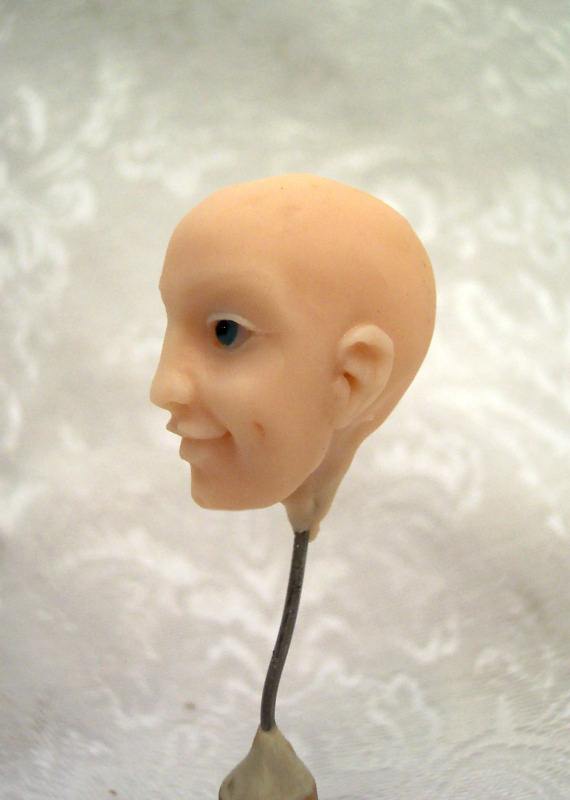


Well, here is the result. I hope you recognize the winning smile of Fortuna, commonly known as Lady Luck
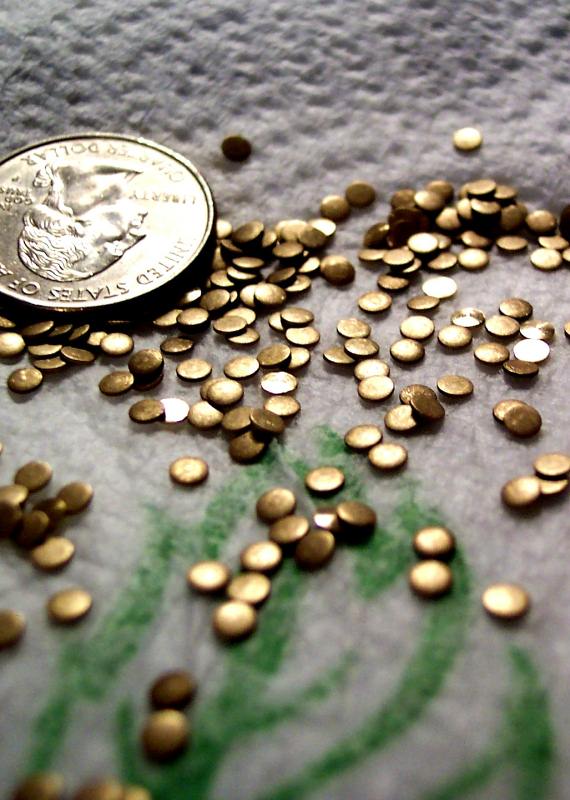
In addition to the globe, I bought 400 hundred miniature Gold Coins! Tiny shiny 3 mm brass disks (they are locksmith Kwikset Rekey Pin Master, look at second bag on the picture, #1 and #2 will work as coins).

Day 6.
Putting the bulk on Fortuna’s torso. Will define and smooth and hopefully bake tomorrow.

My “coins” (Kwikset Rekey Pin Master) have arrived yesterday. Quick rinse in a tarnish remover restored the brass shine. Here they are drying on a paper towel:
Day 7
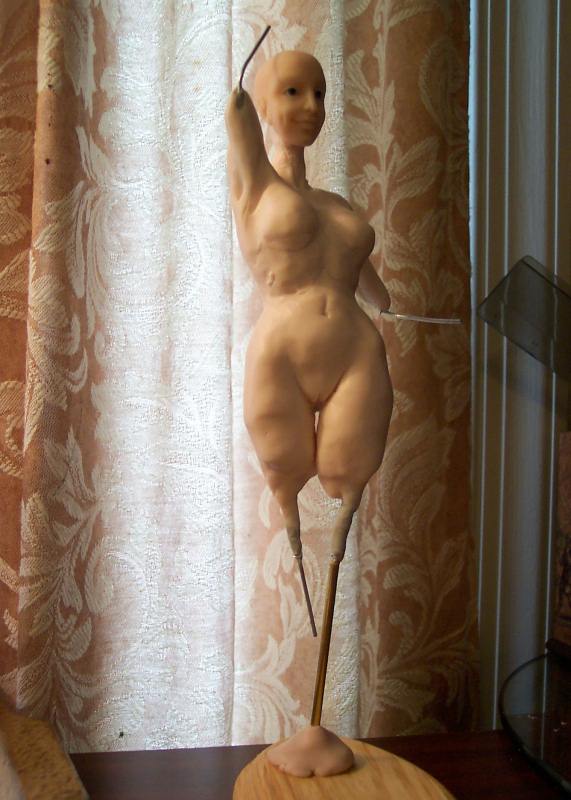
Good morning! It is 6:50 and I already put in a good couple of hours into sculpting, so I have something to show. The torso is shaped and smoothed with Translucent Liquid Sculpey (TLS). I also added more clay to the belly and pelvic area and shifted the belly button down, as the whole belly area was too high and looked wrong. I think it looks better now. I will probably see more mistakes AFTER it is baked, but this is just the way it goes. But, it is all right. Progress, not perfection.


A few people asked how to smooth a sculpt. You can do it with your fingers first, then with a clay smoothing brush and Translucent Liquid Sculpey (TLS) or polymer oil.

Here she is, ready to be fired. The clay is Puppen Fimo (Rose) straight out of the package, so the baking temperature is 230 degrees F. This is a thick chunk of clay, so it will stay in the oven for 60 minutes. The temperature in this oven will be fluctuating between 230 and 240, but as long as it does not go over 260, it is ok (according to the Fimo manufacturer).

Day 8.
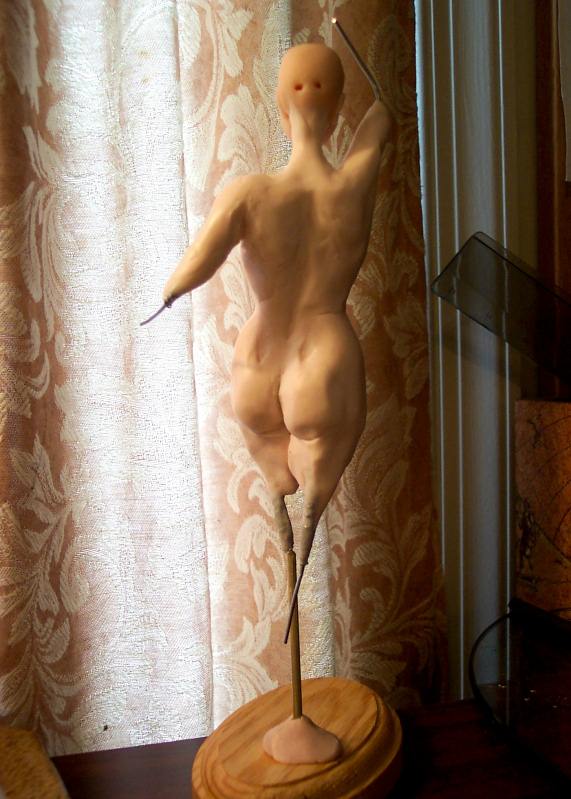
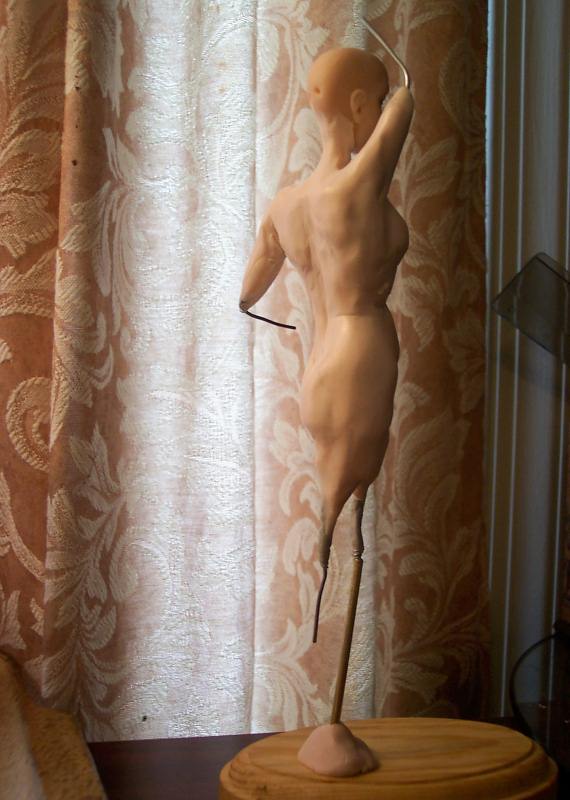
After I baked, I realized that her bottom and belly are still too high. Added more clay and rebaked. I am going for that corpulent Roman Goddess look, but I might have gone overboard. Those are some Olympic-size thighs! She might need to undergo an exacto knife cosmetic surgery, but I am going to wait until I sand down that cellulite on her behind. The upper body is sanded already. Here is what I have:


Day 9.
I made the cornucopia. Searched on google for the material that would be suitable for it and found this:
Cornucopia (From Wikipedia)
“The cornucopia (Latin: Cornu Copiae) is a symbol of food and abundance dating back to the 5th Century BC, also referred to as Horn of Plenty, Horn of Amalthea, and harvest cone.
In Greek mythology, Amalthea raised Zeus on the milk of a goat. In return Zeus gave Amalthea the goat’s horn. It had the power to give to the person in possession of it whatever he or she wished for. This gave rise to the legend of the cornucopia. The original depictions were of the goat’s horn filled with fruits and flowers: deities, especially Fortuna, would be depicted with the horn of plenty.”
Great, so we need a goat horn, or any horn for that matter.
The Magic Drawer…

produced this:

It is a bird made out of natural horn. Awesome find.
A bit of clay, fired up and voila! The cornucopia:

Day 10.
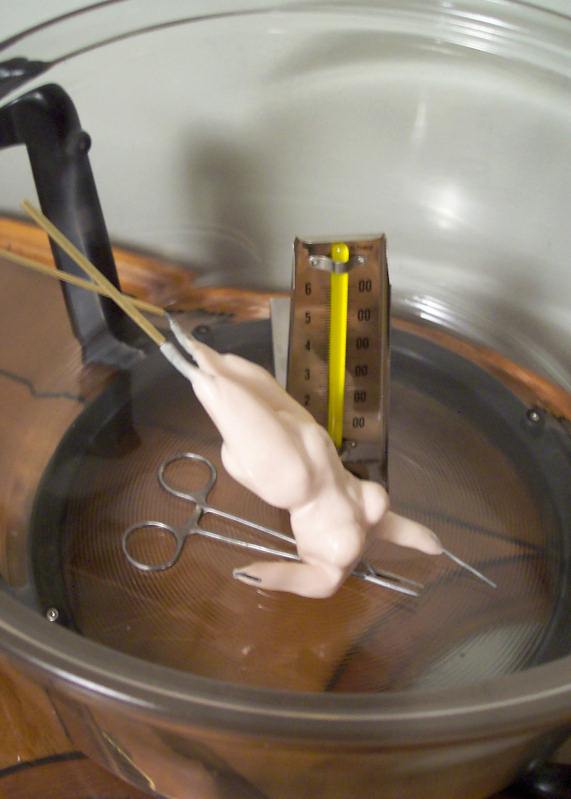
Good morning. The globe arrived and was immediately dismantled to see if it would work – it does!
Here is what was used for the base – a heavy brass candlestick base, the globe, a rod, a large wooden bead to keep rod in place and Magic Smooth. Here it is curing:


Cornucopia is almost done, will add coins when dries. There will be a few random coins down her gown (mental note – buy white silk gauze) and on the globe. It looks a bit silly right now, I think because she is holding the cornucopia with a missing limb, but I needed to finish cornucopia before I sculpt the hand that holds it.
Here is what I have now:


Day 11.
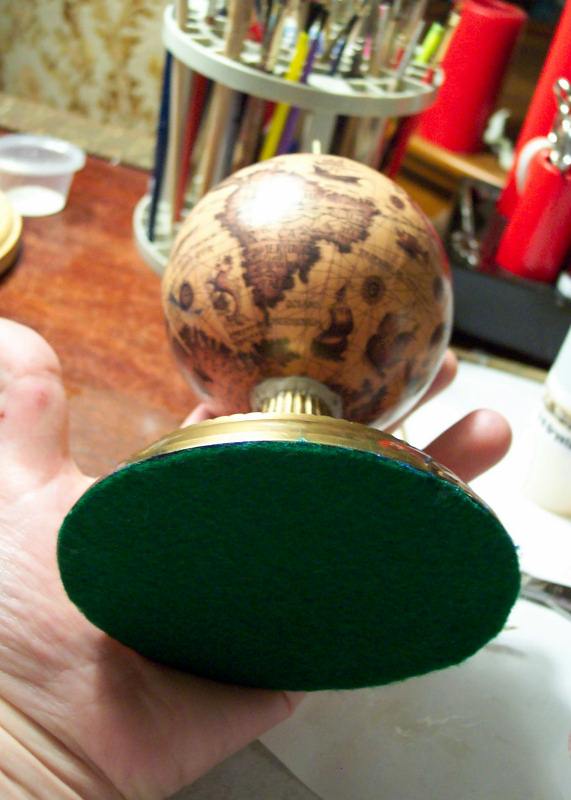
More on globe – I added a blob of Magic Sculpt inside the base – to secure the rod better. Magic Sculpt is heavy and will add some additional weight to the base to eliminate a chance of Fortuna toppling. Closed the bottom with cardboard and finally glued a piece of green felt with Fabritac Glue for a finished look.


Day 13
Feet day. I took a few step by step pictures, not enough to make a tutorial, because I don’t have a set procedure yet – I am still learning anatomy and it is a lot of pushing, pulling and dabbing and correcting. It is more of a general outline.
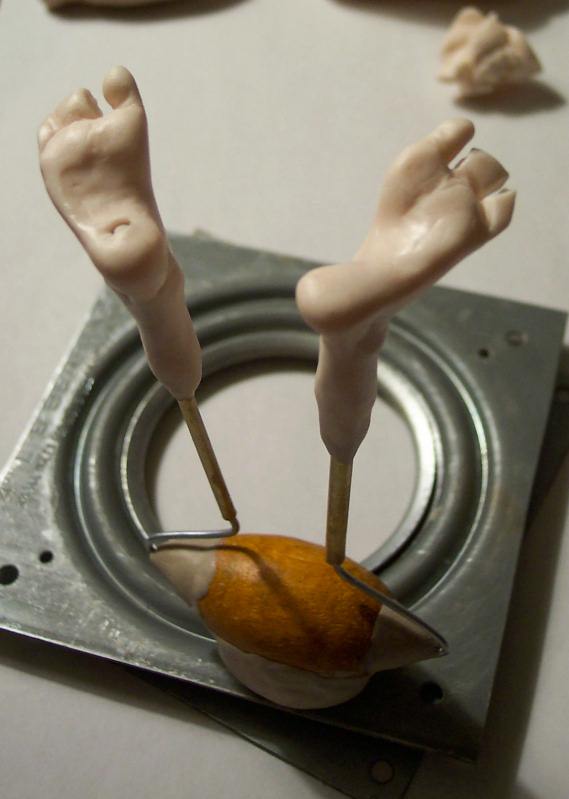
So, feet modules start with little boot like shapes. Then brass tubes are inserted in the heel area.


I made a little Feet Widget which consists of a wooden bead, a magnet and same 17 gauge wire, all put together with Magic Sculpt epoxy. I find it helpful to do both feet at the same time and the Feet Widget keeps them together for easy comparison. It is also posable so I don’t have to drag out the main sculpt every time I need to check the position of the feet. The magnet is helpful to keep it upright for storage and for firing, and securely sticks to any metal surface.


I need to do more detailing on the toes and smoothen everything out. But I reached the point that I cannot go any further without destroying what I already accomplished. The clay is warm and wiggles under my tools. I need to set it aside and allow it to cool off and settle down. Actually it is in the freezer right now, I wonder if detailing might be easier to handle if the core of the feet is frozen. Here they are posed on the globe. Also you can see the book I am using – an excellent anatomy reference – “Dynamic Anatomy” by Burne Hogarth.
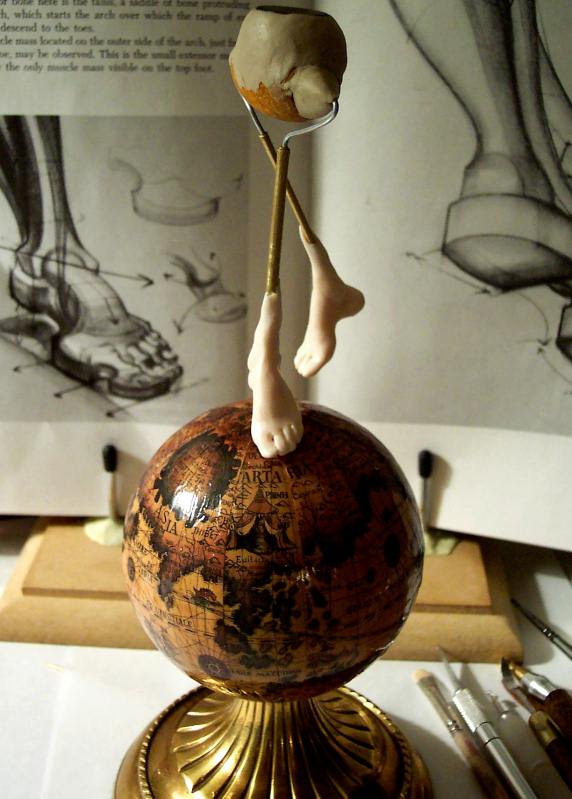


Freezing helped! Not long though before it got warm again, but I managed to finish and fire them up, here they are:


Day 14.
The hands. I am still learning, no step by step instructions yet, but I took a few pictures of different stages of hands, just for general idea.
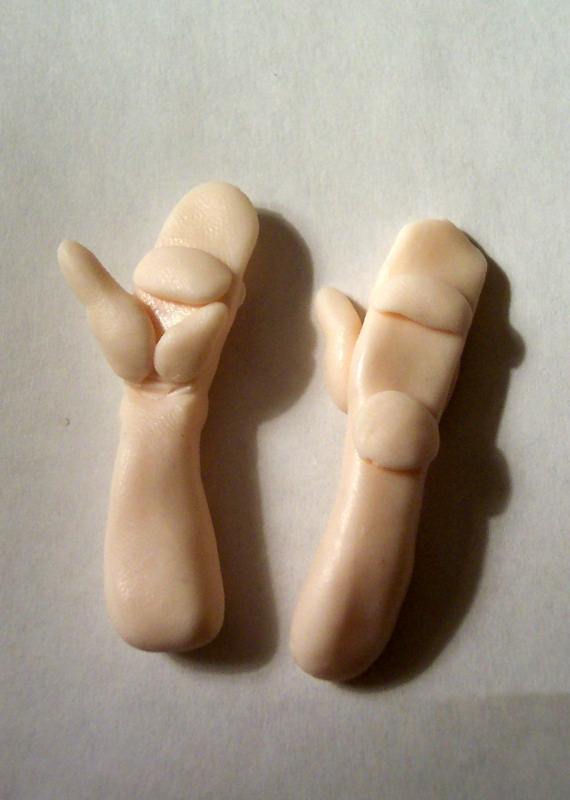


I hope you remember the Feet Widget you met the other day. Well, here is his brother – the Hand Widget. Here is the family photo:


Continues on Part 2

I love watching this because I think 95% (maybe too low?) of an artist’s creativity is “learn as you go.” If we aren’t learning, the challenge is gone, isn’t it?? I love your work and can’t wait to see this project when you’re finished!
LikeLiked by 1 person
Big “Yes”! I am happy to hear that it is interesting. Thank you for letting me know! 🙂
LikeLike
[…] Continued from Part 1 […]
LikeLike
I love your hand and feet widgets think they are brilliant going to try and make them
LikeLiked by 1 person
[…] the maquette’s wire skeleton, I am using Morezmore Modular Brickhouse armature – if you are interested in step by step […]
LikeLike