Continues from Part 2.
Hair Style – a classic Victorian (Edwardian?) Bun
Tools and materials on the photos
– Tibetan lamb fur (remnants in Snow White, Silver Grey and Flaxen Blonde)
– Fabritac glue
– scissors
– toothpicks
– small thin micro spatula (to tuck the ringlets into the hairline)
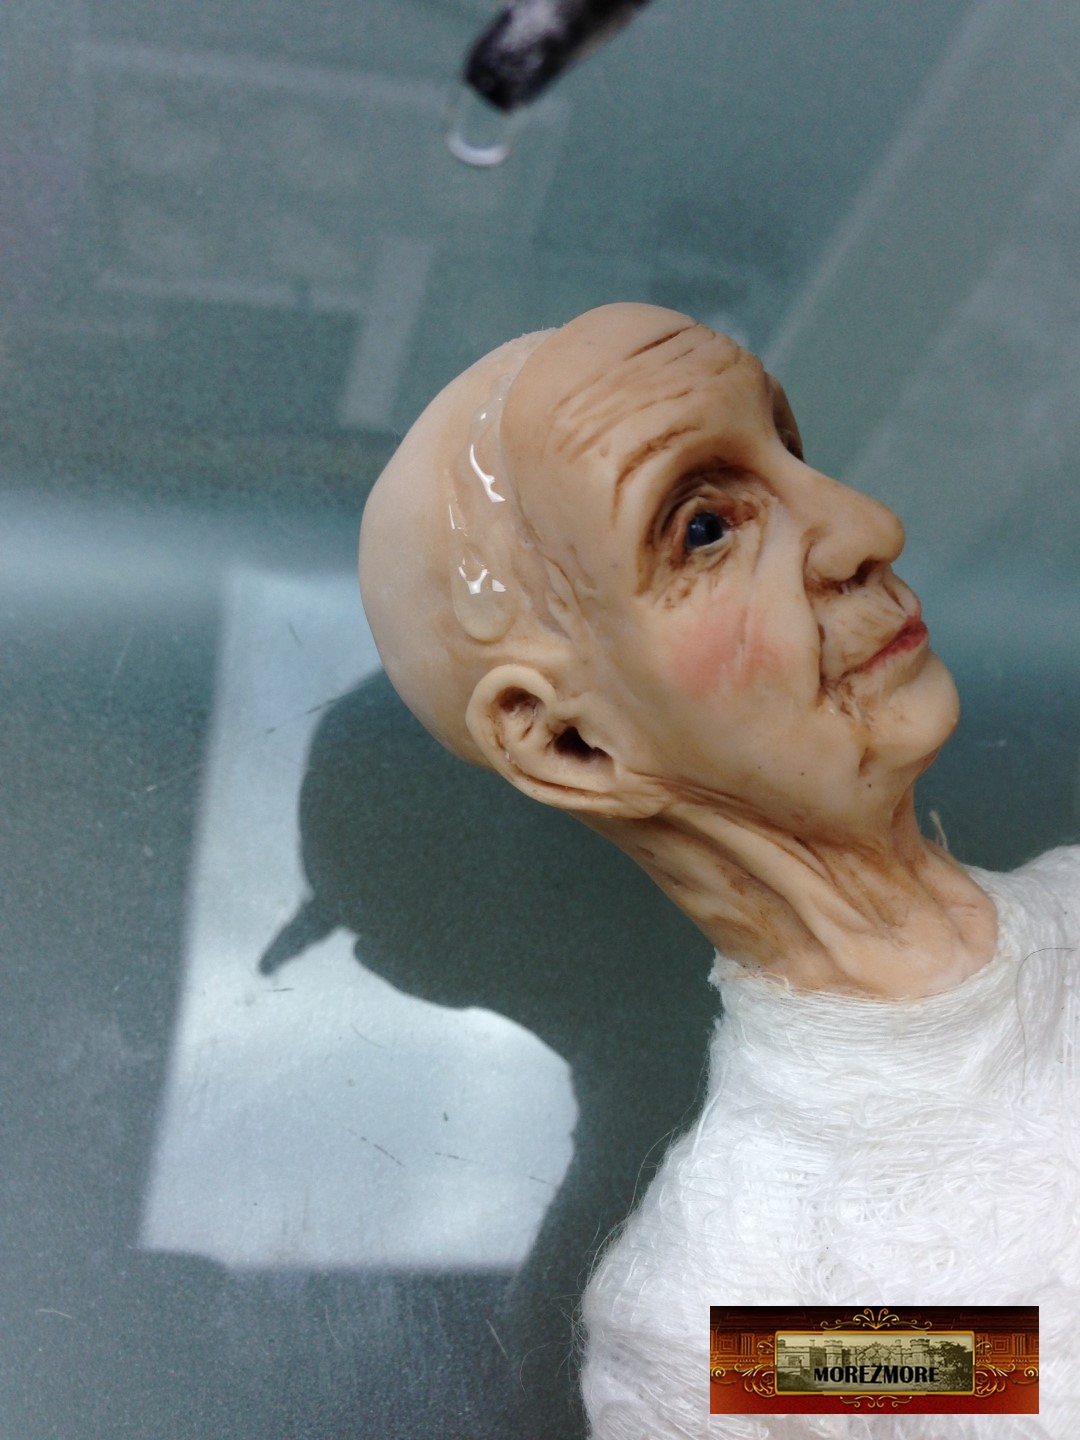
So here is where we left yesterday:


Off we go.
A few additional wispy ringlets on the inside of the hairline of the wig.
Time to glue to wig permanently.

A few more tiny pretty ringlets at the temples and at the neck.


Tie the hair in a ponytail.


Make the bun.


Secure with pin needles and small drops of glue.


My version of a Victorian hair comb.


.


.


*******************
Stockings, Shoes and Drawers
Tools and materials on the photos
– a nylon sock
– a piece of thin stretchy fabric for drawers
– a piece of thin white lace
– Fabritac glue
– scissors
– toothpicks
– small thin micro spatula (to tuck in the fabric)
– lambskin leather remnants
– thin black cord or string for shoe laces
– upholstery needle


.


.


Changed leather remnant to another color, the other one was too orange.


.


Here are a couple of pictures missing, about the sole and the heel – the photos did not come out. Basically, draw the outline of the foot on a piece of leather, cut and glue.
To bring it all together and to hide seams, brush the shoes with a bit of brown paint.


 .
.


*******************
Bag
Tools and materials on the photos
– a piece of crocodile finish leather,
– a piece of thin stretchy fabric lining
– brass tubes – square 5/32″
– grid paper and pencil
– drafting divider
– ruler
– “Glass, Metal and More” glue
– parchment paper or any heavy paper
– trim cord
– fold over cord crimps
– Fabritac glue
– scissors
– toothpicks
– mini spatula
– brass jewelry findings
– 2 mini magnets for the clasp (one on the clasp, one inside)
– acrylic burnt umber paint
– disposable brushes


.


.


.


.


.


.


.


.


.

Now, paint brown everything that is not brown.
Glue brass findings.
Glue mini magnets (one on the inner part of the clasp), one inside on the bag front wall.


Blouse
Tools and materials on the photos
– paper towels
– cotton voile fabric (will be listed after Nov 28, 2016)
– Fabritac glue
– scissors
– toothpicks
– mini spatula
– pearl microbeads for buttons
– jewelry findings for the brooch
Caution: Easy, non-professional, no-sew doll dressing.
DO NOT LET THE THE GLUE TO SOAK THROUCH THE FABRIC. That will leave stains.
Small amount of glue at a time.
Dilute fabritac with acetone (the kind sold in hardware stores, not nail polish remover) to make it thinner and easier to work with. Clean up occasional glue spots and strings with brush dipped in acetone.
Wrap the doll in a paper towel. Cut everything that is not needed.
Unwrap – this is what I got.


Pick the half that looks better.
Transfer on double-folded fabric and cut out.


Glue it on.


Collar and cuffs.


Buttons are pearl microbeads.
Brooch – a piece of an earring.


Straw hat.
No progress photos, because I was not sure my idea would work at all. But it did.
I made it out of paper, then glued rug warp 8/4 (thick cotton thread) in spiral all around. The rug warp is natural off-white color, so I bathed the hat in strong black tea which turned it yellowish. I think it looks like straw.


9 


Thank you for your interest, see you soon.
Continues on Part 4.

[…] Thank you for your interest, see you soon. Continues on Part 3. […]
LikeLike
You are amazing. The face is just beyond belief. I hope one day to be able to come close to your talent.. Thank you for sharing step by step with all of us..
LikeLiked by 1 person
Thank you very much, Linda!
LikeLike
I am in awe of this Miss Marples. I have always been a fan of this character in book and film. You have truly brought her to life. I look forward to seeing more of her evolvement, and to more from your creative mind…and hands!
LikeLiked by 1 person
Thank you very much, Merilynn. My favorite lady – in book and in film too! I am enjoying this doll so much!
LikeLike
Bravo !….Well done!….What I find about sculpting an aging face that is so very endearing ….all those wonderful well earned lines & I always try to remind myself,….. ” age gracefully “!
LikeLiked by 1 person
Indeed. That is what I was thinking as I was sculpting – Miss Marple’s (Joan Hickson’s) face is so beautiful, I hope I will do her justice.
LikeLike
Will she be for sale when you are finished? I’d like the first opportunity to purchase her.. She reminds me of my Grandmother. She always has as I watched her videos..
Linda
LikeLiked by 1 person
Certainly, Linda! If I decide to sell her, I will let you know. Traditionally Morezmore dolls are sold on Ebay auctions, starting bid 0.99. Thank you 🙂
LikeLike
Stunning…. Thanks for sharing
LikeLiked by 1 person
Thank you for watching this, Pnina 🙂
LikeLike
[…] Continues from Part 3. […]
LikeLike