Good morning, friends!
Last Update: March 8, 2017.
Continues from Part 2.
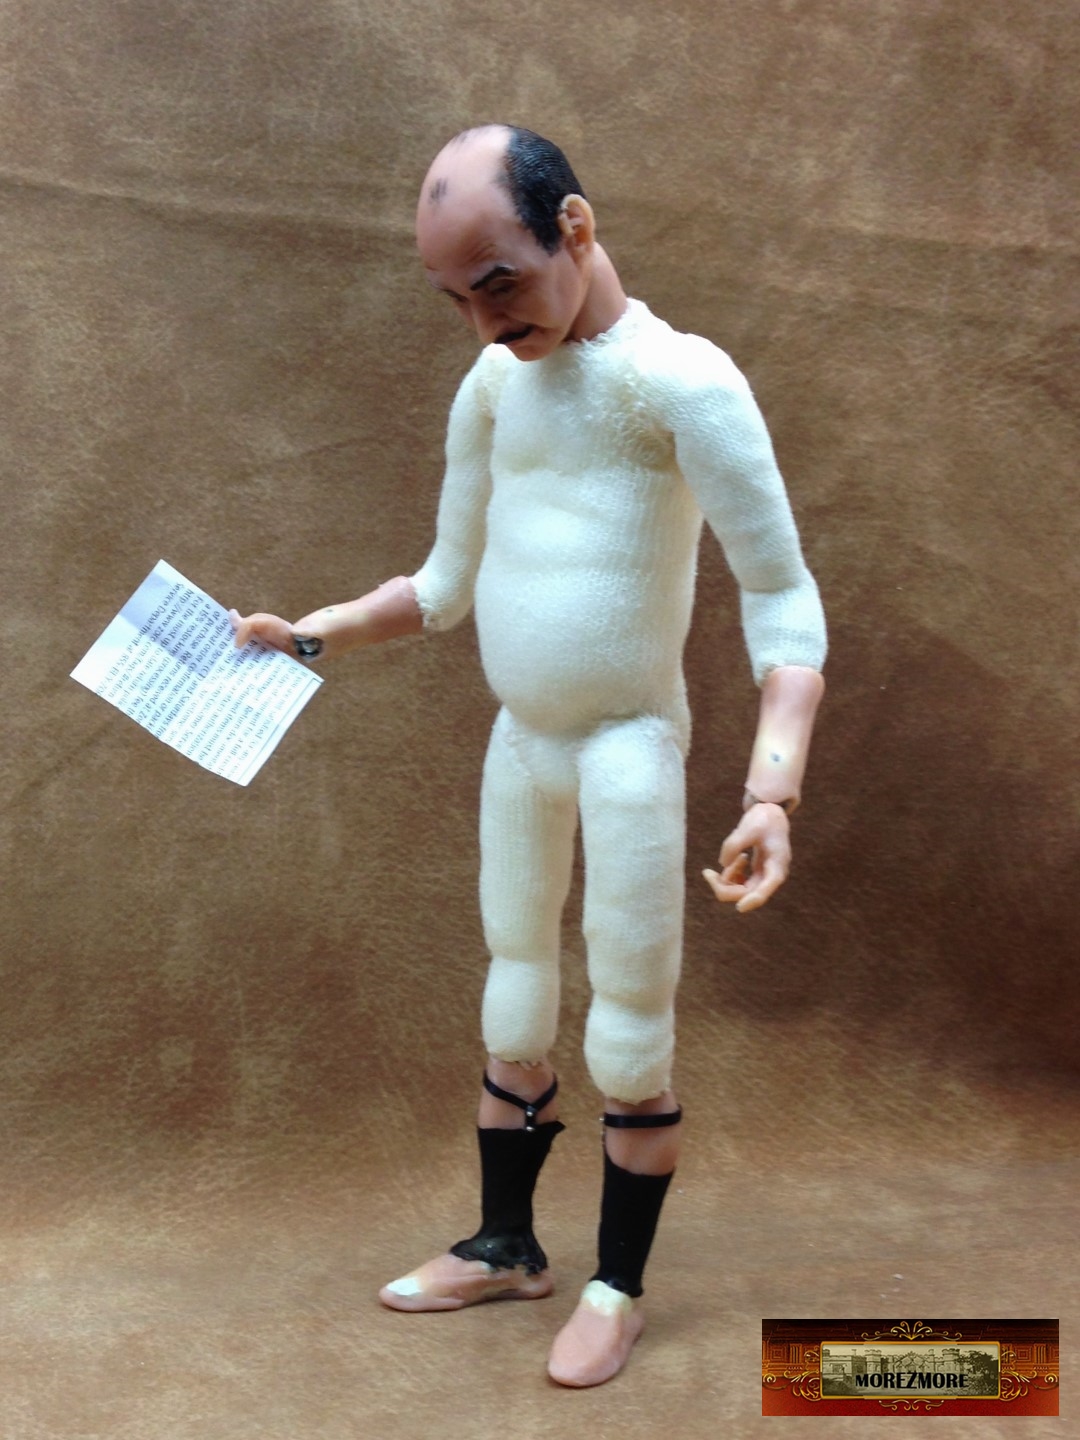
Monsieur Poirot is an experimental doll.
I will, of course, write a step-by-step process description after I complete this one.
I will include the links to the Humanly Posable Armature parts at Morezmore.
If you just arrived and landed here, you can see the detailed description of the parts and tools here.
I will be glad to see people joining me on this project (using stop motion armature for OOAK doll).
**********************
The hardest part is done, now it is time for fun – dressing!
This is what I have by now:


**********************
Next – the head is painted.


A short picture story for you:
“Mail?… So early?”

“A gruesome murder! and I am still in my garters!”
“George! My shoes, please!”

**********************
So, dressing…
For much more detailed description of how all this is made, please see Making Miss Marple posts. Poirot dressing will be very similar.
Materials used:
– paper towels (to measure off on the doll before you cut fabric)
– cotton voile fabric for dress shirt
– black satin ribbon for bow tie and garters
– black rattail cord for shoe laces and pince-nez string
– black nylon stocking for sheer socks
– black stretch velvet for vest
– grey stretch fabric for suit
– Fabritac glue
– scissors
– toothpicks
– mini spatula (to tuck fabric in)
– mini cabochon tray for
– mini link chain for watch
– jump rings for pince-nez frame (will be listed after February 3, 2017)
… this list will probably continue


Bloody garters…


*********************
At long last, I am back with Poirot. I had to take care of some emergencies and then catch up with the store work. Anyway, Poirot finally got his pants on. I also did some research on the details of his shoes. And the materials for accessories are also here – will describe them later, as I use them.


*********************
The vest and the watch.
The vest (and the pants) are made out of stretchy fine thin grey jersey, the same way as the Miss Marple suit.
Tools and materials used:
– paper towels
– stretch fabric for the suit
– Fabritac glue
– scissors
– toothpicks
– mini spatula
Pocket watch:
– watch casing
– mini link chain
– mini jump rings
– crystal lacquer
How to:
1. Print a small 10 mm image of a pocket watch, for example one of these:


2. Cut it out and put inside the watch casing.
3. Put a drop of crystal lacquer of the watch face image, making a clear “dome” over the watch face.
4. Allow to dry, attach the chain with a jump ring (you will need a needle to make the end chain link a bit larger, because the chain is very fine).
5. Use 2 more jump rings to attach the pocket watch chain to the vest.
Buttons are made the same way as on the Miss Marple suit.
-“Let me say zis, mon ami. It should not take 5 weeks to get my jacket ready.
I have sympathy for you.”


******************************
Jacket in progress and… oh, yes… ze inside pocket for ze pince-nez.


Thank you
Continues on Part 4

This is awesome! I’m looking forward to seeing your tutorial and next steps.
LikeLike
Thank you, KimM 🙂
LikeLike
You are amazing! He is coming together beautifully! Once again great job!
LikeLiked by 1 person
Thank you, Theresa!
LikeLike
I can’t wait to see the conclusion. Will you be selling this doll?
LikeLiked by 1 person
Thank you, Tiana! No, not this one – my daughter wants him.
LikeLike
Your talent is a shining beacon my dear friend. For someone who has dolls building in my head for what seems to be years, I can only imagine the hours that Monsieur Poirot has been inside yours. Planning, working with tiny pieces, ordering other tiny pieces to be made and working and hoping that you were right in your estimations and the ABSOLUTE THRILL when you finally see you HAVE been right, it IS going to work must be such a wonderful moment my dear. This is a monumental breakthrough in Doll Making to allow the fine movements that you have achieved. I bow my head to you Natasha and I am SO proud to be your friend and to be able to watch you reach this point in your career. I’m also sorry to say, glad you had your hold up so I could be here at home again with my WiFi to watch this exciting reveal!!! Thank you for sharing my dear, your many students and I have been learning every inch of your progress. Thank you
LikeLiked by 1 person
Thank you, dear Margot! Yes, I do build the doll and all the props in my head first. Funny, that you mentioned it – I never told that to anyone, but now I am thinking, it is not unique – probably all of us do. In bed, before falling asleep, I visualize the pieces, shapes and textures, turn the parts around, trying to fit them one by one. 🙂 Thank you very very much for sharing this with me, it is definitely much more fun, not to mention – flaterring! 🙂 Hug!
LikeLike
I think this is the posable doll method I’ve been yearning for 😀 When will the tutorial be available? I’m not exactly mechanically inclined, but with step-by-step directions I think I can learn this. So happy you tried it yourself and worked so hard to find supplies that really work–thank you!
LikeLike
Great, happy to hear it! Right after I dress Poirot, I will start another doll – with the step by step explanations. 🙂
LikeLike
You just made my day 😀 I have a show coming up over Memorial Day weekend…not sure I can master this in time to be able to show one there, but I’ll give it a try.
LikeLiked by 1 person
[…] Hello, friends! Last Update: April 16, 2017 Continues from Part 3. […]
LikeLike
[…] Thank you for watching, see you later. Continues on Part 3. […]
LikeLike