Continues from Part 1.
Wrapping – something new for me, but definitely a well-known method of making a body.
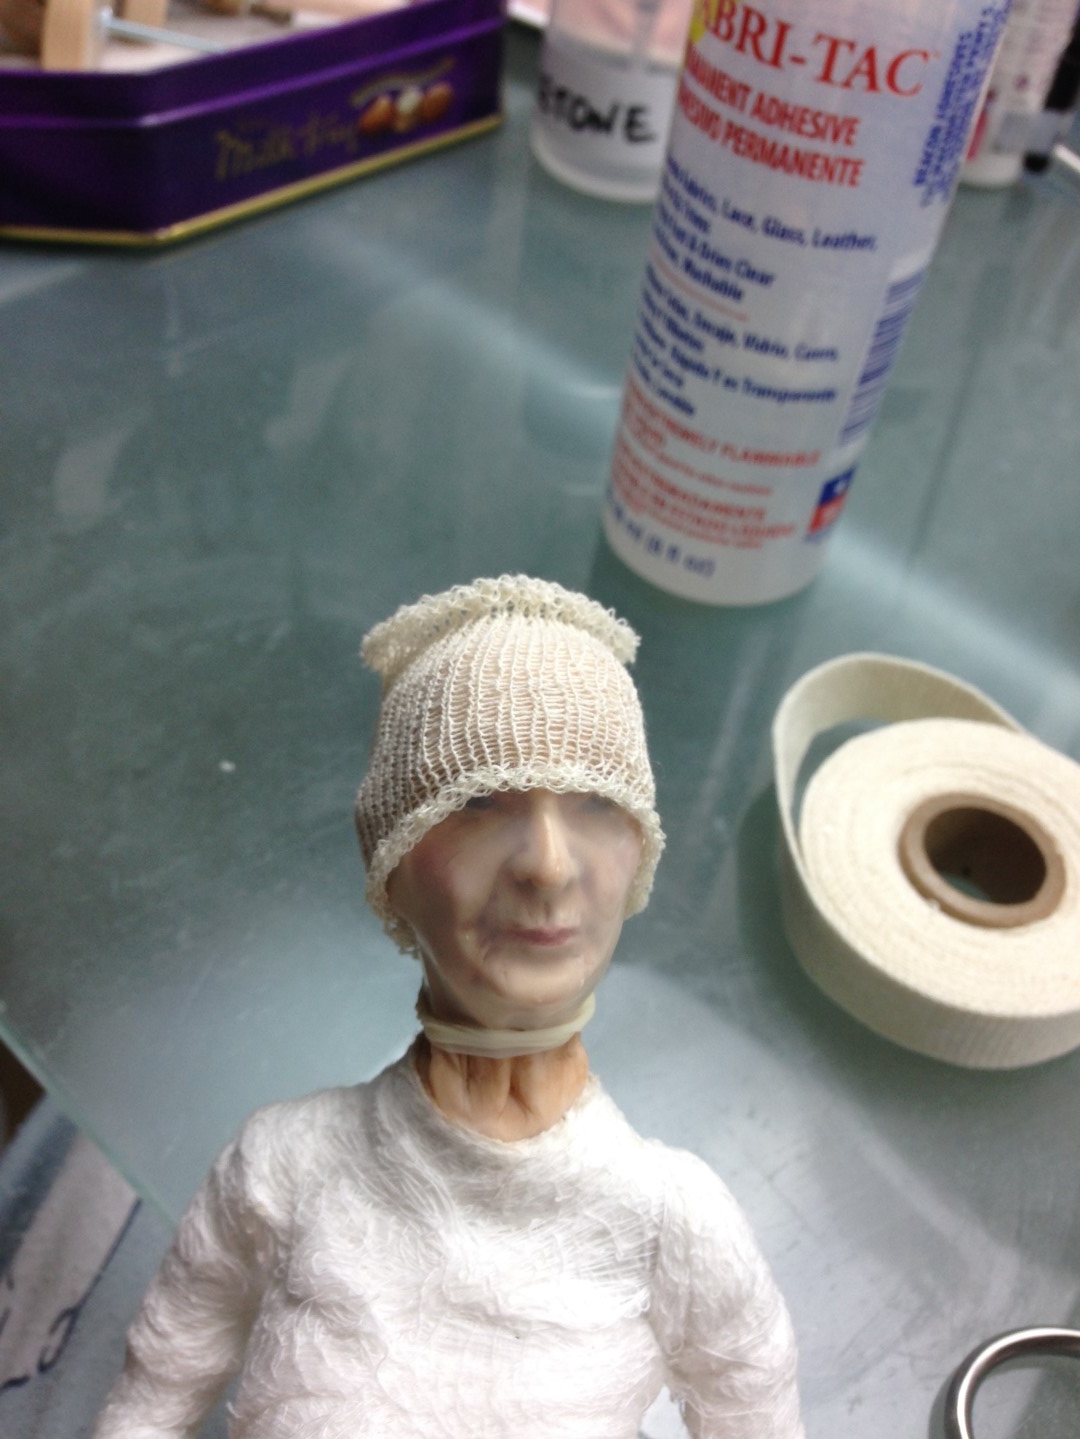
I decided to wrap Miss Marple’s body in cotton gauze instead of sculpting it out clay because after she is dressed, she will never be undressed. So no need to put Miss Marple through the indecencies of sculpting every wrinkle and bit of sagging flesh out of clay. Her aging body is not what we love her for. Right now she might look like a patient fresh out of a mental asylum, but you wait and see, I am sure she will look very elegant with the hair and clothes on.

On the pictures you see the attempt #3. Did not like the first two versions.
What I learned:
1. Use glue (frequent small dots). I used Fabritac fabric glue.
2. Do not try to build the bulk in a particular spot with gauze, tuck in a part of a cotton ball under the gauze instead.
3. Wrapping is much easier and faster than sculpting the body in clay.
Tools and Materials on the photos:
– medical cotton gauze
– cotton balls
– Fabritac glue
– mini scissors
– toothpicks
– mini spatula


There were other minor changes:
– lengthen the neck slightly.
– shave off clay from her cranium to her hairline – to allow for the hair wig, otherwise the head would be too big.
– trimmed and sanded her hands to make them thinner and more birdlike.
– trimmed her feet to allow for the shoes leather thickness.
– epoxied all the modules in place with the Magic Smooth.
**************
Face and hands painting
Tools and materials on the photos
– Genesis heat-set paints (Burnt Umber, Genesis Red, Ultramarine blue, Titanium White – these are included in the Genesis Paints Survival Kit
– fine detail brushes
– q-tips – to wipe the paint (regular household for wiping and mini q-tips for fine detail)
– Polymer smoothing oil – to dilute genesis paints
So, here I have my genesis paints – on a ceramic palette under the lid in a chinese food container they stay good for years. The trial 5 gram jars that we sell might last for a life-time.


Put a thin wash of Burnt Umber in polymer smoothing oil.
Wipe. The small amounts of the paint will remain in the wrinkles.
Draw more wrinkles with a fine brush.


Well, that is pretty much it. Final touch – some Genesis Red + Titanium White on the apples of the cheeks and some Genesis Red + Burnt Umber + Titanium White on the lips.
Well, I think she looks lovely.


Same on the hands, plus Burnt Umber + Titanium White + Ultramarine Blue for the veins.


And bake – just for a few minutes after the temperature reaches Genesis setting temperature, which is least 250ºF/121ºC but not exceed 280ºF/138ºC.
Not enough time- the paint will smudge, too much time and it will change color.
Genesis Paints: Information, Instructions and Colors.
For best results, use an oven thermometer.


..

Hair
Tools and materials on the photos
– Tibetan lamb fur (remnants in Snow White, Silver Grey and Flaxen Blonde)
– Fabritac glue
– pure acetone (technical, hardware store type) – to dilute Fabritac glue and for clean up
– scissors
– small hair comb
– toothpicks
– 5/8″ wide cotton tubular gauze (will list tomorrow Monday November 21, 2016)
– latex finger cots
So here are my Tibetan lamb remnants. Miss Marple is blonde with silver streaks.


.


Cut the hair off the skin.


Cut the ring of a latex finger cot.


Put the finger cot on the head.
Cut a strip (yes, this long) of 5/8″ tubular gauze.


Same strip of tubular gauze stretched.
Dilute Fabritac with acetone to make it thinner, it prevents stringing. It is much easier to work with when making hair.


Put the tubular gauze on the head.
Press down and trim the excess of the gauze, making a little “hat”.

Apply the Fabritac glue again – on top of the hat.


Pick up a lock of Tibetan lamb, cut the end, apply Fabritac and glue it to the “hat”.


For grey streaks, mix in the white and grey.


Let the glue dry completely – 2-3 hours.
Gently take off the wig.
Trim the edges, leave 3-4 mm.


Put the glue on the edges and tuck them inside. Press with pliers all around.


Well, here you go. Natural Tibetan Lamb locks. You can leave it like this if you go for the fairy godmother look. But Miss Marple would prefer a more sensible hairstyle.


So, take the wig off and brush it out. You will loose some hair, that’s ok.
Gently wet under the faucet.
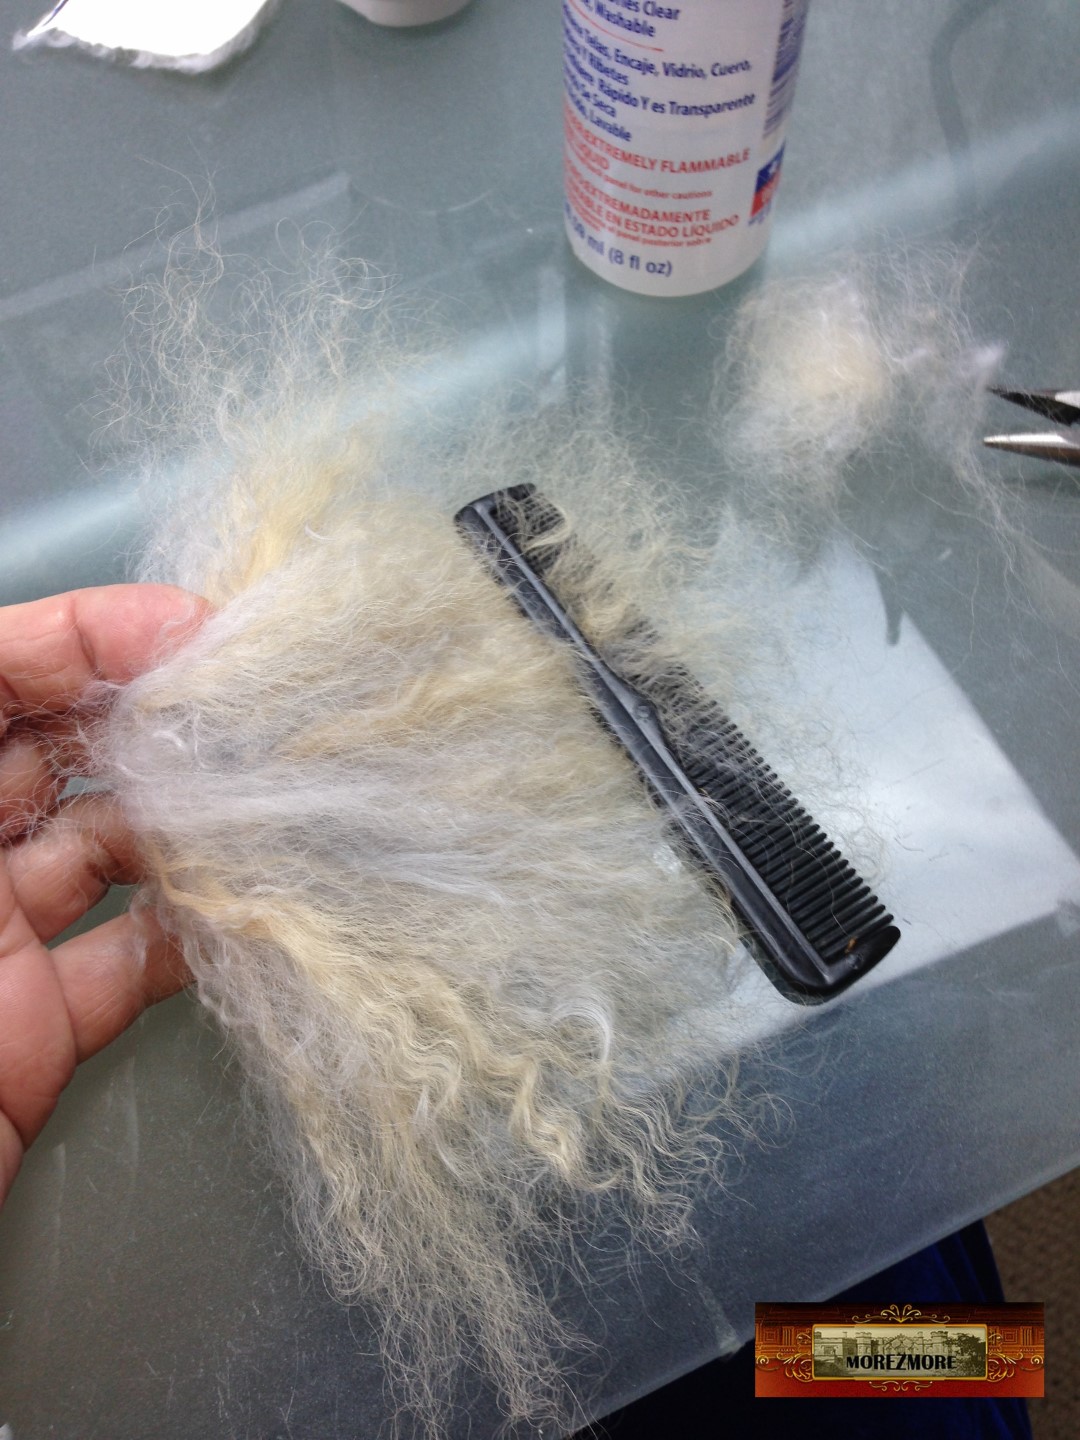

Gently tap with a towel. Scrunch in your fingers to allow the locks to form.
Let it dry.

I will make her Victorian bun tomorrow. Meanwhile, here is what I have.


.

There are 2 advantages of this technique:
1. Hairline is much nicer.
2. It is possible to do the parting. I did not need it this time, she will have a high Victorian bun, but this is a very useful feature – the parting. To do the parting – take the wig off and tuck the parting in and sew from inside. I think it will work, need to test.
Thank you for your interest, see you soon.
Continues on Part 3.

That is absolutely amazing. I do enjoy your blog
LikeLiked by 1 person
Thank you!
LikeLike
WOW. I not only love the ‘real’ Miss Marple, but also love seeing her come to life through your sculpting. Thank you for sharing.
xxx
LikeLiked by 1 person
Thank you! 🙂
LikeLike
She sure looks a lot like Miss Marple. I love her little shows on the educational channels. I always thought she looked like my wonderful maternal Grandmother.. Very pleasant.. Thanks for sharing..
LikeLiked by 1 person
[…] Continues on Part 2. […]
LikeLike
[…] Continues from Part 2. […]
LikeLike