Morezmore OOAK Doll #30
Scale: 1/6, Size: 10.6″ (27 cm)
Continued from Part 4 – Body(Part 4 – Body webpage became too heavy with images, I had to break it up)
Tools and Materials:
Must have:
– proportions image
– polymer clay (I am using Cernit)
Optional:
– mini calipers
– ruler
– flat clay smoothing brush
– forceps
– X-Acto knife
– “Get a grip” sculpting handle
– Bone Thumb tool
– Translucent Liquid Sculpey
– polymer oil
– Abrasive mesh
**********************
I missed my Get a Grip handle and installed it – on the fly, right into the clay. Aaahh.. much better now.
At first, because this is supposed to be a “first OOAK doll” workshop for my Facebook friends, I was trying to keep things simple and did not install the nut for the handle into the armature. But, at the moment of weakness, frustrated with my own fingers ruining the “good, just finished” parts by trying to hold on the doll, I gave up and installed the nut – on the fly, right into the clay on the back. And baked. Fearing that it might not work – I usually put the nut on the armature at the beginning, super secure, with the wire and all (see the picture of the armature below). Well… it holds. I am pleasantly surprised. Perhaps, simply baking the nut into the clay is good enough. Perhaps, securing it with the wire was an overkill. Or, perhaps, it holds because the clay is Cernit. Cernit is known for it’s strength, which means this trick might not work with other clays.
By the way, that is why I always gently correct people when they say “your tutorials”. No, they are not tutorials, because the word “tutorial” implies a tried and confirmed procedure with predictable results. My blog contains quite the opposite – first time trials and errors with unpredictable results. So I call my blog posts “workshop notes”, they are just records of my doll-making experiments.
The bottom line – I again have my grip on the doll. The small contraption consists of the same screw as the horizontal arm on the sculpting stand that I sell, with a small wooden handle – it is easier to hold a handle for prolonged periods of sculpting than just the screw by itself. The handle is secured on the screw with Magic Smooth epoxy gel, to prevent rotation. I like it. If you think you can use one of those, the handle with 2 nuts is available at the store (see the list of tools and materials above).


After all the sculpting is done, all is left a small hole in the back, which can be covered with a ball of clay and baked during the final bake.


Another tool I wanted to mention – is this “Polished Bone Thumb”. This is for the places where you need to press with something large and flat (like your thumb), but your thumb does not reach, like between the legs, or into the armpit. Or when your own thumb is unavailable, for example it is injured.


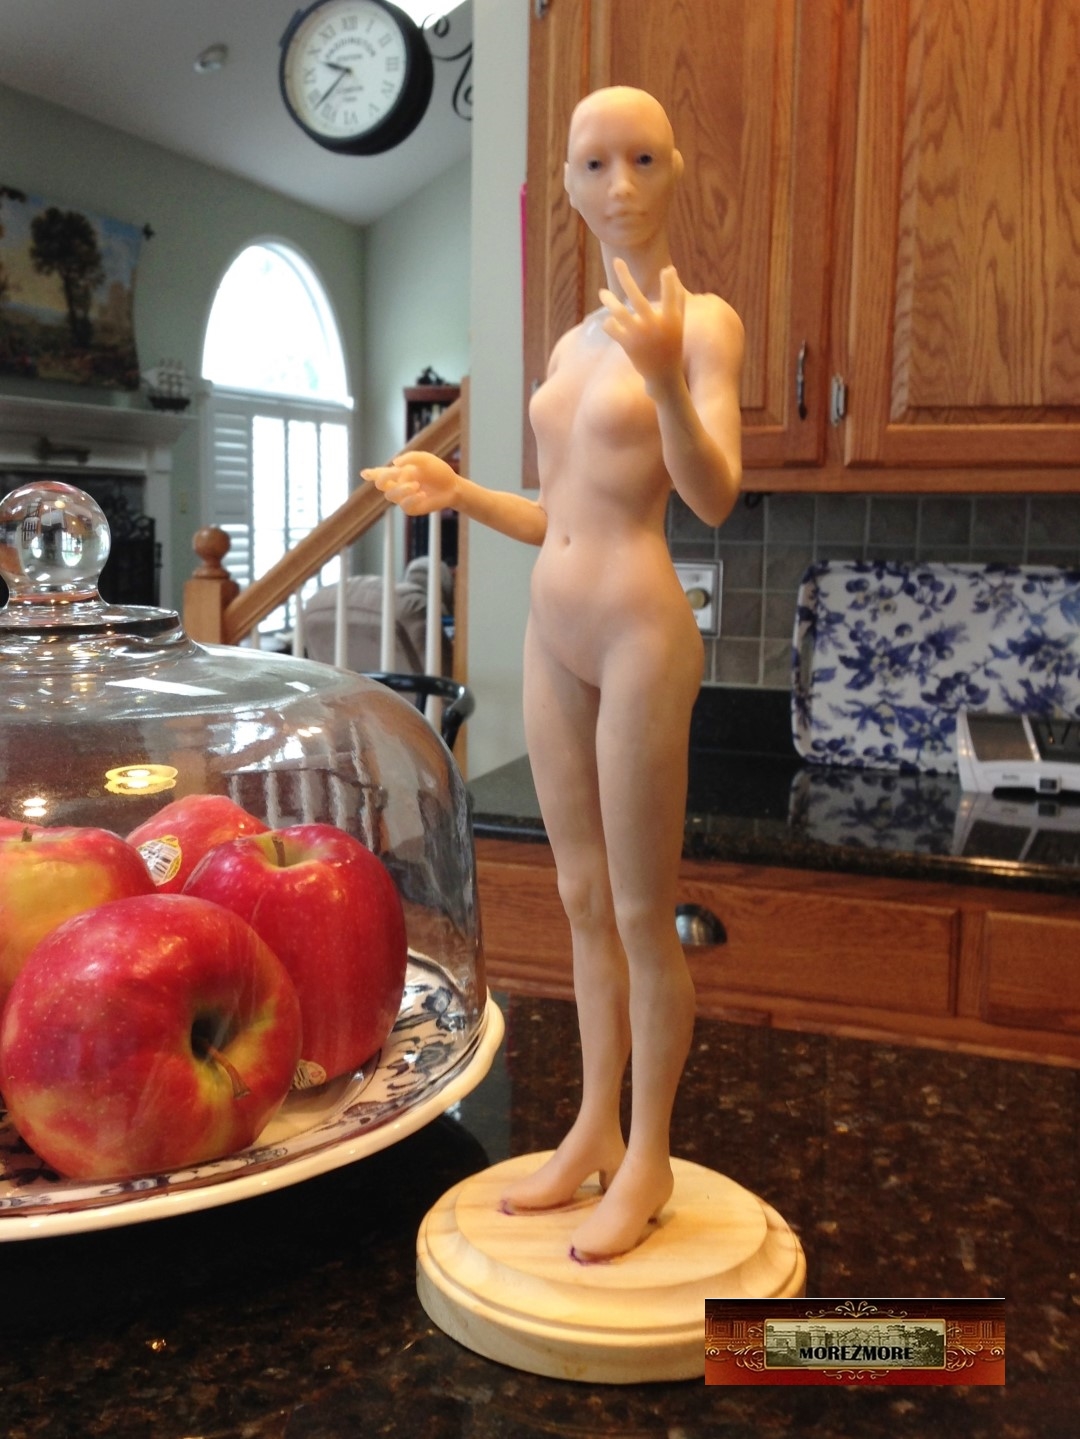
As far as progress on Alice is concerned, I am working on it. Not quite done, but close.


Just baked and cooled off. Here is the “Get a Grip handle in the baking arrangement – so that no part of the doll would touch the glass.


Next:
– sanding – to make the clay smooth, to remove bumps, even make slight corrections in the anatomy.
– covering the whole doll with a polymer clay sealer – to make her even smoother and to cover the sanding marks. Usually I use Translucent Liquid Sculpey and like it very much. But this time I will try my new Air-Dry Acrylic Matte Varnish.
Sanding.
Then washing with soap.
Then drying for a couple of hours


Sanded and dried surface looks like this.

I read somewhere that these scratches can be cleaned up by a brush with acetone. Yes, they can! Acetone dissolves polymer clay. It worked pretty well. I wish I took pictures of the scratch lines magically disappear. Next time I certainly will. The reason I did not take the pictures was that I was in a disaster recovery mode. The thing is I got in trouble with the acetone. It is so effective that if one is not careful, it can dissolve the clay more than one asks for. As I was brushing and rubbing away small flaws on her cheeks with the acetone, Alice face fully covered with acetone, the tip of her nose and top eye lids pretty much dissolved. So I had to add clay to the eyelids and to the tip of her nose. That means another baking. By that time I was so worried I ruined my Alice, that I did not feel like experimenting with a new clay sealer which I had said I was going to try.
So, long story short, I added clay to her nose, and clay to her eye lids, covered her with the old familiar friend – Translucent Liquid Sculpey TLS (actually it is a mixture of TLS and polymer oil – about 3 parts of TLS and 2 parts of oil) and baked. Big sigh of relief. Successful recovery. She is ready for makeup and hair and dress


Continues on Part 6

She is wonderful, the anatomy is amazing! I just bought the handle to try with my future sculpts! You said you use Magic Sculpt to secure the handle to the nut in the doll–because of this is it difficult to remove the handle when you are through sculpting?
LikeLiked by 1 person
Thank you for shopping! No-no, there is no Magic Sculpt, just the wire. If you open the listing for the handle on Ebay, there is a step by step how to attach the nut with the wire to the armature. For Alice I put the nut right into the clay. It holds nicely, but the clay is Cernit, it is very strong. I don’t know if this will work for other clays.
LikeLike
Oh–I see, you said, “The handle is secured on the screw with Magic Smooth epoxy gel, to prevent rotation.” I haven’t used that before. I was thinking it said Magic Sculpt! Thanks for getting back to me!
LikeLiked by 1 person
Oh! I understand now. That is about the handle itself – how I make it. Don’t worry, this is my job. You will get the handle already made.
LikeLiked by 1 person
Thanks, I understand! 🙂
LikeLiked by 1 person
[…] Continues on Part 5 – Body Finish […]
LikeLike
Hello! It’s my first time posting in MoreZmore blog and thanks for having me here.I Love the beautiful sculpt of this great beauty you have created. She’s stunning! Also, I have purchased this new tool, Polished Bone Thumb, almost two weeks ago and I can’t wait to use it since I’m trying and testing a new clay. Thanks so much for your wonderful tutorials and products on MoreZmore Ebay shop, they truly help me to improve my techniques.
Marie Georghy Jacob
LikeLiked by 1 person
Thank you very much, Marie! 🙂 I am happy to hear it!
LikeLiked by 1 person
None of the pictures in the tutorials are available. Can yo check the links? I would love to give this a
LikeLiked by 1 person
Thank you, Nancy! I refreshed the server. If you see something wrong, please please let me know.
LikeLike
I can’t see any of the pictures either. Could you refresh the server again please?
LikeLike
Refreshed again, sorry about that!
LikeLike