Morezmore OOAK Doll #29
Scale: 1/6, Size: 11.5″ (29 cm)
Part 1: Armature.
Tools and materials:
– proportions image (laminated with scotch tape)
– thick wire steel 14 ga
– thin wire steel 24 ga
– long-nose pliers
– wire cutters
– brass tubing 1/8″ and 3/32″
– tubing cutter
– wooden plaque for base
– armature stand (rotating) or non-rotating
– “Lock-it” nut
– Magic sculpt epoxy putty
**************
Proportions image: There is a huge number of proportions charts on the internet: google “female proportions”. If you like the one I use (by Andrew Loomis) – here it is. Click to enlarge and print.

Step by step:
001. Cut 3 pieces of thick wire. The length of piece #1 and #2 – from wrist – to shoulder – to neck – to tailbone – to hipbone – to heel. The length of piece 3 – from knee to top of the head:
002. Bent the wire:
003. Wrapped the pieces of thick wire together with the thin wire:
004.Bent at shoulders and hips. Cut at the bottom and at the wrists:
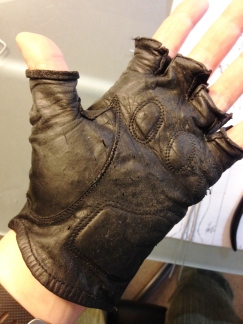
By the way, old motorcycle gloves protect the hands from nicks and cuts while working with wire:
005. Bent the spine to make the natural spine curve:
006. Cut brass tubing 1/8″ to make legs, arms and heads modules:
007. Made a base: cut a piece of brass tubing 3/32″ and inserted into the wooden plaque.
With a drill: Drill a hole in the plaque, fill it with magic sculpt , insert piece of tube, let it cure.
If you don’t have a drill, you can make a hole (with much more difficulty) with an ice pick. Trim the armature standing leg wire so that it will fit on tube of the base:

008. Put the armature on the base and make the pose.
009. Threaded the wire through the Lock-it Nut:
010. Attached the Lock-It Nut to the armature with thin wire – as tight as I could:
011. Screwed the armature nut onto the horizontal wire:


Extra horizontal arm works as a handy handle while sculpting:
012. Took even parts of resin and hardener of Magic Sculpt epoxy putty and mixed it well.
It gets uniform white color and slightly warm.
013. Applied to the armature, built some bulk on rib cage, hips, scull. Left the joints open for the time being, so that I can correct the pose later. Left it to cure. Magic sculpt working time is about 30 minutes after mixing, curing time to “hard to the touch” – about 1.5 hours, complete cure – 12 hours.
Continues in Part 2.


I love to watch your works in progress…I love the details….so interesting to watch………thanks for sharing!
LikeLiked by 1 person
Thanks for sharing again and ///love your work
LikeLiked by 1 person
Thanks for starting up your blog and eBay store again.
I’ll be in touch.
Carlo
LikeLiked by 1 person
[…] Continues from Part 1 […]
LikeLike
Hi Natasha, I’m working my way through your tutorial on Water Lily, and I’m confused about the three wires and their lengths. The way it is worded (“the length of piece #1 and #2 from wrist to shoulder to neck to tailbone to hipbone to heel and piece #3 from knee to top of the head) doesn’t compute for me.
LikeLike
Certainly, Bobbie, glad to be of help.
Here is what I mean:
https://i1.wp.com/www.morezmore.com/galleries/Fortuna/xl_100_4381.jpg?zoom=2
LikeLike
and this:
https://i0.wp.com/www.morezmore.com/galleries/Fortuna/xl_100_4383.jpg?zoom=2
LikeLike
and one more: http://morezmore.com/galleries/Vasilisa/xl_Vasilisa12.jpg
LikeLike
OK, I think I get it! Thank you.
LikeLiked by 1 person
[…] the maquette’s wire skeleton, I am using Morezmore Modular Brickhouse armature – if you are interested in step by step […]
LikeLike